Makerware
- Thing-O-Matic
- In 2012, Twigg and Ben made 3D Printer.
- Ben’s New 3D Printer Helix


.
1st Day Of 3D Printing
. . .
- After several months.
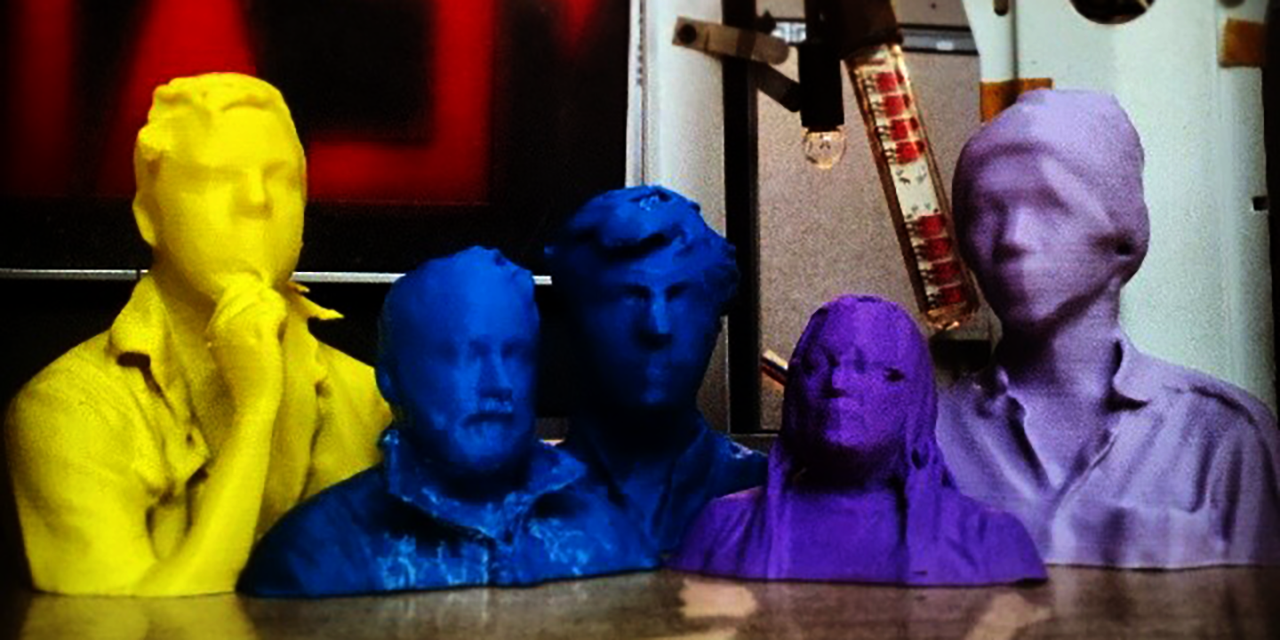
- 3D Scanner and other pics


.
Development Of 3D Printer
(if its link doesn’t work: read here.)
-
FIRST MONTH: SEPTEMBER 13 – OCTOBER 13
-
It has been exactly one month since the 3D printer(MakerBot Thing-O-Matic) was turned on this year. In this space of time, we have been printing on a regular basis and thought a blog would be good way to share progress. Here’s a rough timeline to date:
-
September 13-14, 2013: Turn on printer. First prints attempted had very little success, we have referred to these as “learning moments” and many have followed.

.
- September 20-21, 2013: First successful prints at low quality resolution using ReplicatorG 0040.

-
September 23-28, 2013: Print 20mm Calibration Boxes repeatedly, results less than stunning.
-
September 25, 2013: Move TOM to a permanent location in the Grad-Lab to avoid drafts. Relocate existing spool holder to top of machine with horizontal alignment, prints improve.
-
September 28, 2013: Update TOM firmware to v4.4 Sailfish, finally have a successful 20mm Calibration Box.


-
September 30, 2013: MakerBot MakerWare v2.3 released and implemented with our printer. More success. Ordered new parts from MakerBot including new extruder drive gears, stepper drivers v3.3 (plans for dual extrusion) and new self aligning linear bearings.
-
October 2, 2013: Implement new vertical spool holder.
-
October 3, 2013: First successful .1mm “high-resolution” print.

-
October 5, 2013: Start printing more upgrade parts including new x-axis follower , extruder drive block and clips for plexiglass enclosure.
-
October 7, 2013: New parts arrived. Continue reading archival documentation from MakerBot before parts are replaced.
-
SECOND MONTH: OCTOBER 17-18
-
The past couple of days have been impressive! Tatsuya and Geoff replaced all self-aligning linear bearings on the X, Y and Z-Stages of the Thing-O-Matic. It was also discovered that the Y-Axis idler that was believed to be a total loss, just needed repairing.


- After re-installing the X-Y Carriage, a slicing engine torture test was run. Results were in some ways positive, however we believe the TOM can do much better.


- The Z-Stage Motor Flange was also missing some washers at hex-nuts, these were replaced as well.